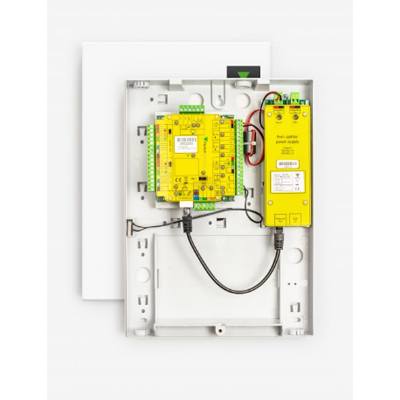
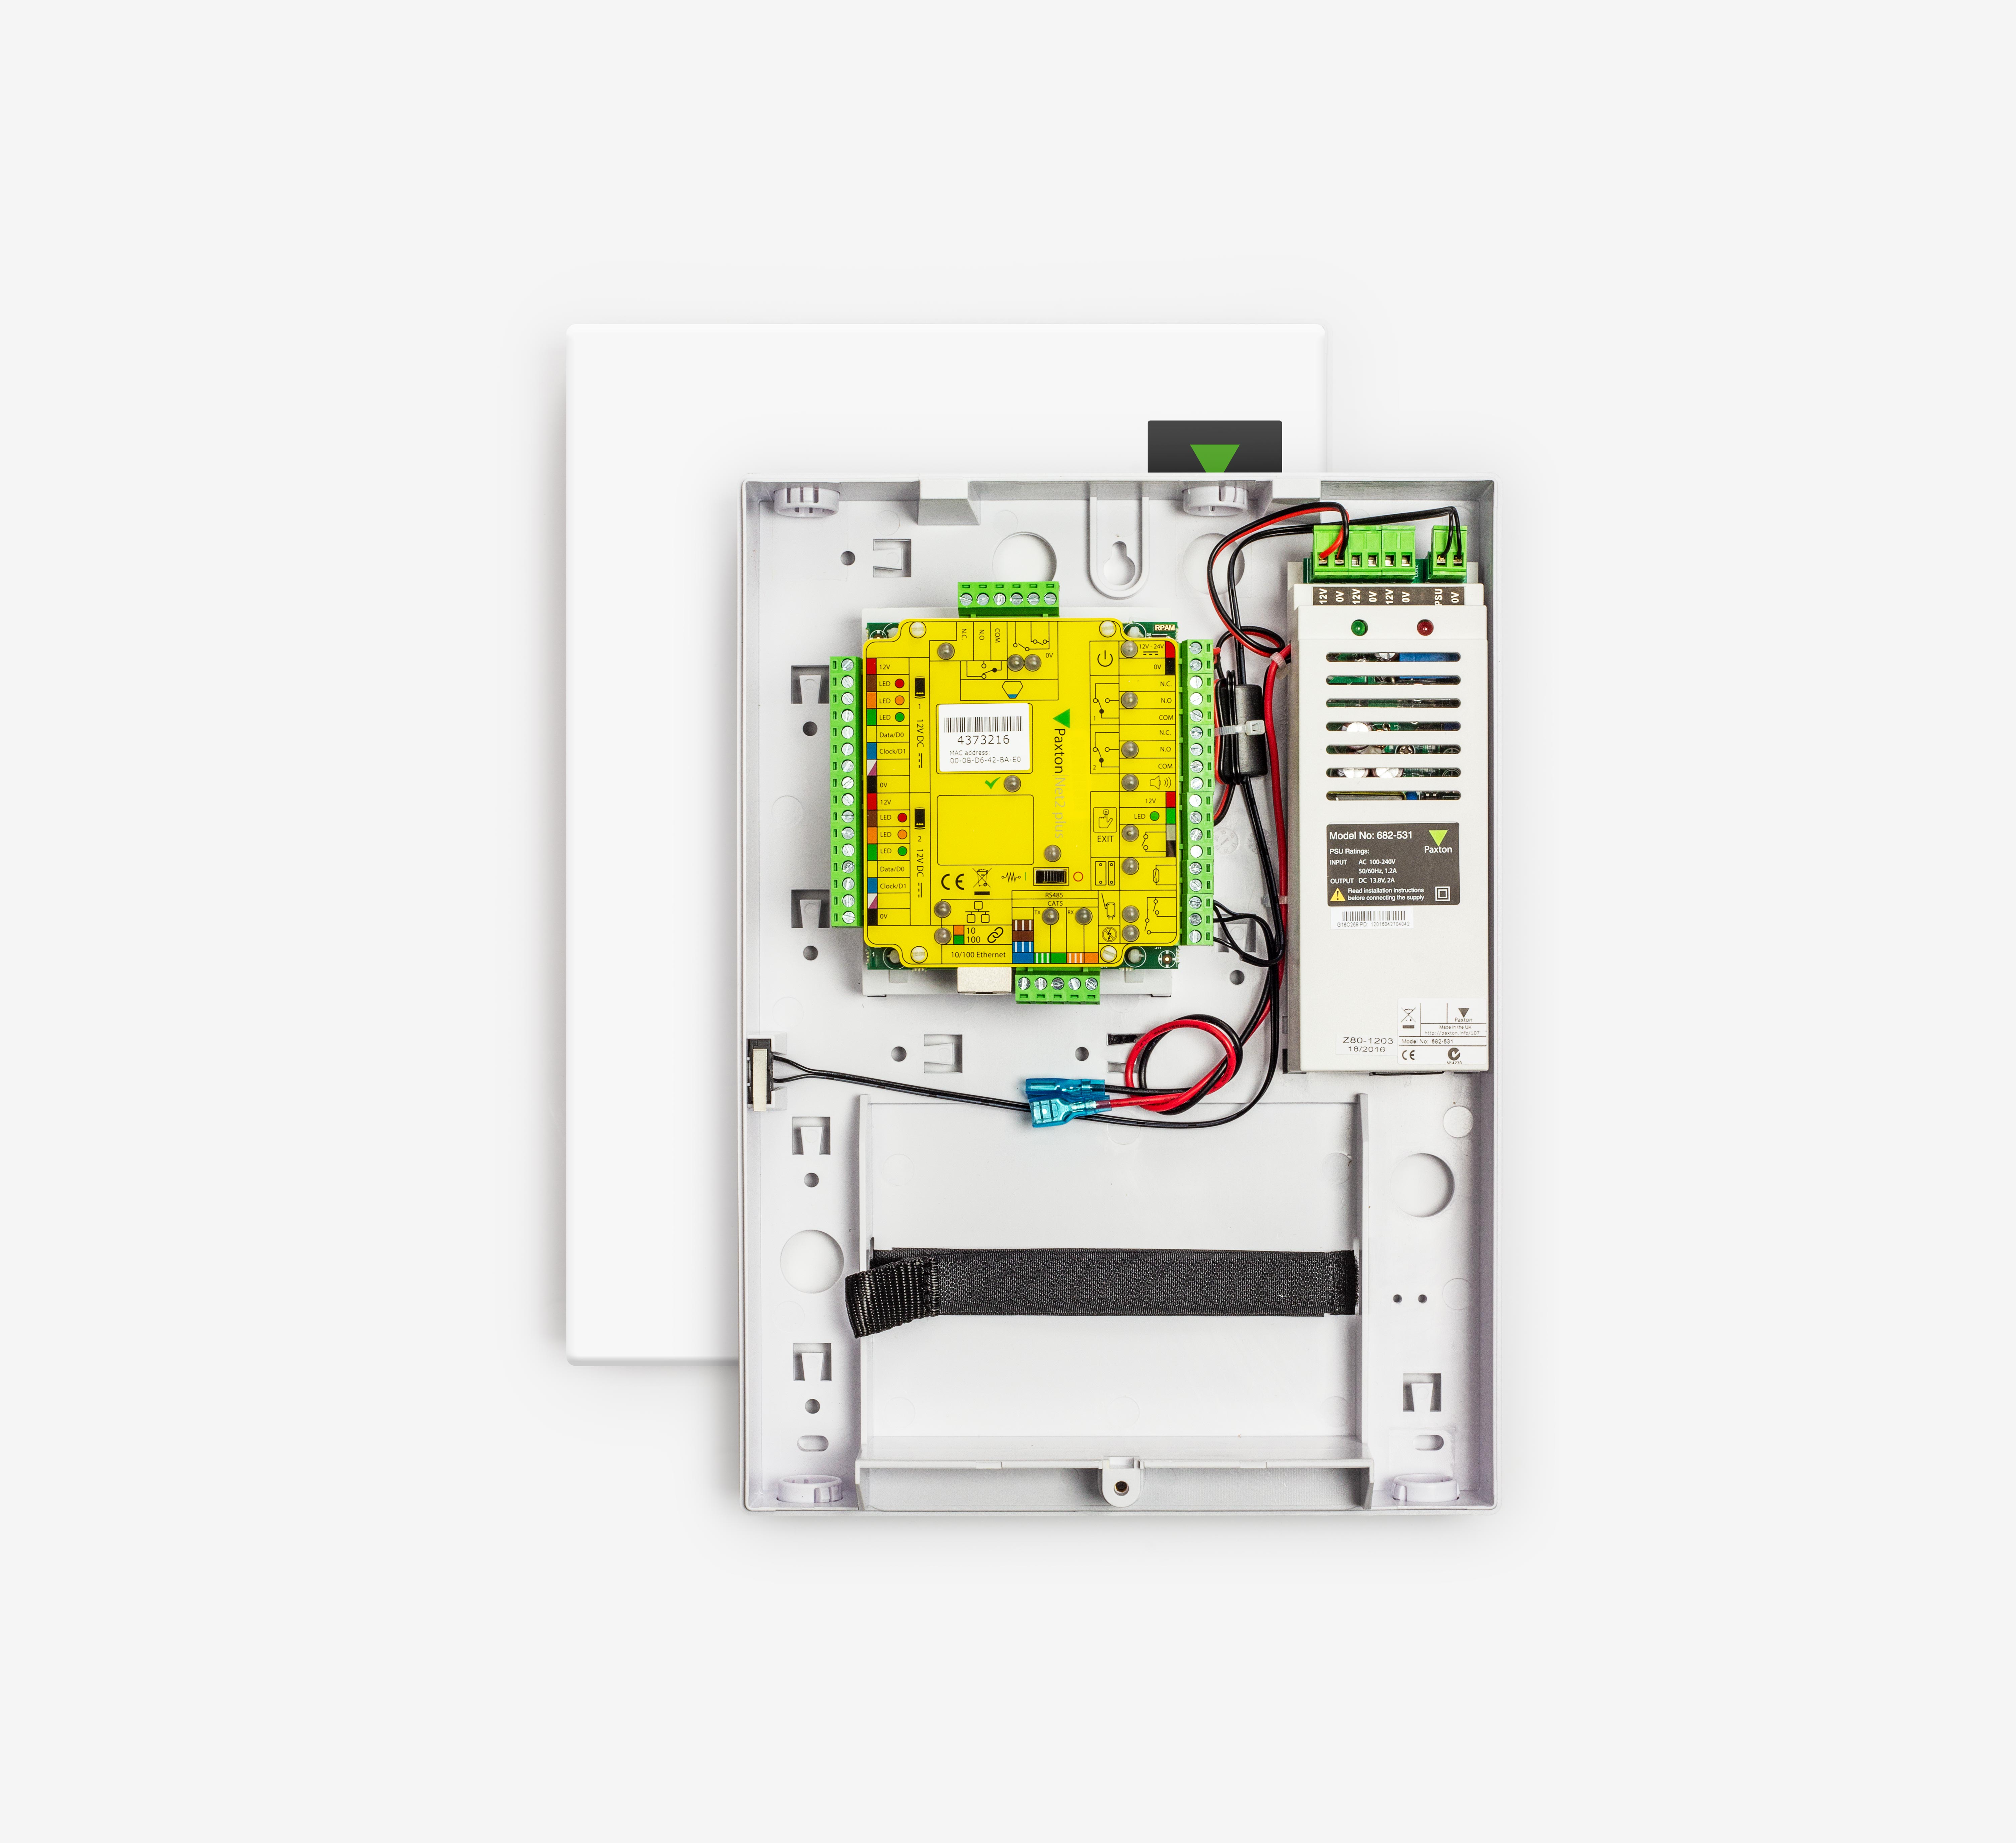
Net2 v4 2 installation of a net2 classic in a psu enclosure the best way to install a classic acu is in the specially designed paxton power supply enclosure. Overview net2 hardware ease of wiring clearly labelled terminals on every access control unit remove the need for continual referencing to wiring diagrams.

Details About Four Door Tcpip Access Control Kit With Cabinet Rfid Reader Exit Button Key Fobs
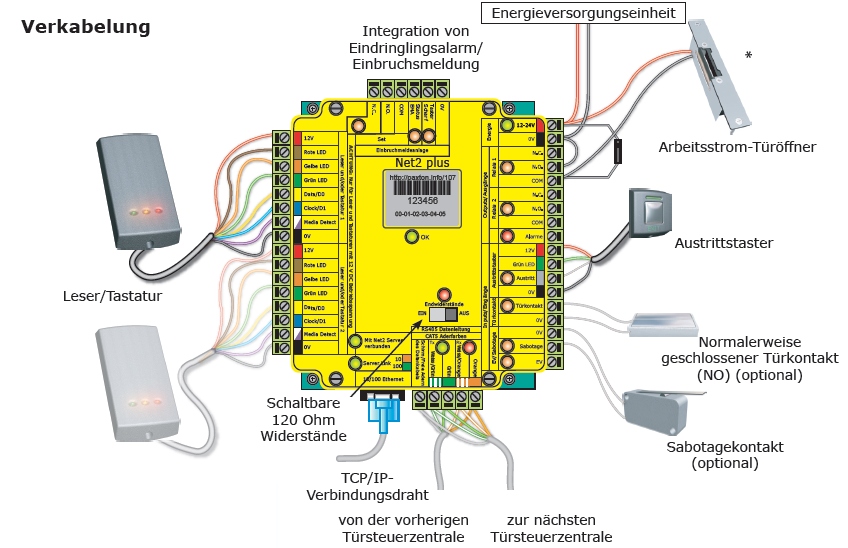
Paxton net2 classic wiring diagram. This unit contains a net2 acu a 2a 12v dc. Of ip battery powered door entry and wireless or wired door controllers to suit any site paxton connect admin app only works with net2 pro v or above. For a net2 plus acu. The diagram below shows the general wiring layout. For example when using timesheet it is only necessary to install a reader and the data connection. Clear colour coding of.
The diagram below shows the general wiring layout for a net2 plus acu. For a net2 plus acu. Not all of the equipment shown. Net2 professional can be configured to use one of the. Inputs on the net2 acu to accept an alarm signal from a fire alarm system to automatically open specified doors during an alarm condition. For example when using timesheet it is only necessary to install a reader and the data connection.
Power supply with an output in the event of mains failure. A charging circuit for the addition of battery back up and an enclosure tamper switch. Not all of the equipment shown needs to be installed on every door. Any of the four inputs on a net2 acu contact exit tamper or psu can be used as a fire alarm trigger. Control units are automatically detected. Net2 v3 supports the use of multiple comports allowing for star configuration networks from the pc.
Not all of the equipment shown needs to be installed on every door. The diagram below shows the general wiring layout. The selection of acu type and their method of connection to the net2 server pc tcpip rs485. The selection of acu type and their method of connection to the net2 server pc tcpip rs485.
Gallery of Paxton Net2 Classic Wiring Diagram